Tuesday, September 18, 2012

Vegan Pumpkin Cookies

Today's post is inspired by This Pin!

Here is the original recipe.


Here is what I did!!!


Pumpkin Cookies

What you need: 

nonstick spray
1 cup brown sugar, firmly packed
1 cup Splenda for baking
2 cups canned pumpkin
1 cup unsweetened applesauce
2 teaspoons vanilla
4 cups all-purpose flour
2 teaspoon baking soda
2 teaspoons baking powder
Pumpkin pie spice to taste
Cinnamon chips to taste

What you do: 
1. Preheat oven to 350 degrees F, and grease a baking sheet. Beat sugars, pumpkin, applesauce and vanilla.
2. Sift together dry ingredients. Stir into the pumpkin mixture until smooth. Blend in cinnamon chips.
3. Drop by spoonfuls on prepared baking sheet, and bake for 12-15 minutes.

I have to say I did NOT take pictures during this process. :/  Bad Blogger!  Next time for sure!!  They turned out delish and my DH was shocked they have no added fat in them. (aside from the cinnamon chips)  I added the web-site that I order my chips from...  They are so yummy!  Please note that the chips I use are NOT vegan!

Friday, September 14, 2012

Banana Oatmeal Muffins


OK, this morning's post is inspired by this Pin.  

I woke up early this morning and was browsing Pinterest, I came across this recipe and thought it looked super Yummy, and I had all of the ingredients so I gathered it up and got to work...  

Here is the website for the recipe.


The changes I made are in BLUE!  I did follow some comment suggestions on the original bloggers website...  

Ingredients

*2 /1/2 cup oats (old fashioned kind, not quick cooking)

*1 single serving cup (or 1 cup) of plain low fat Greek yogurt (I used 1 applesauce container, the kind you buy for lunches)

*2 eggs

*3/4 cup sweetener of choice, I used the real stuff: sugar! or 2 tbs stevia sweetener (I used 1/2 cup sugar in the raw)

*1 1/2 tsp baking powder

*1/2 tsp baking soda

*2 bananas (I used 2 1/2, the baby wanted a banana...)

Important: The paper liners don't work well when baking with a base that does not include flour, they always seem to stick to the paper. I sprayed the muffin tin with non-stick cooking spray or you can use foil cupcake liners or a silicone muffin pan.

Let the Baking Begin!

1. Preheat oven to 400 degrees. Spray tin with non-stick cooking spray or line 12 muffin tins with silicone or foil liners, (or just use a silicone muffin pan).

2. Place all of the ingredients, including bananas in a blender or food processor, and blend until oats are smooth. *Important: I add the oats a cup at a time and then add the liquids. I have to stop the blender and stir a few times throughout as well. 

3. Divide batter among cupcake liners, and bake for 20-25 minutes, or until toothpick comes out clean. (Mine were done in about 18 min)

4. Most importantly: Enjoy!!! 

There I was poring away into muffin tins when C walked by, his current OCD breakfast food of choice is...  Wait for it!


He looked at me and said "You should totally try making pancakes out of the rest of that batter!"  So that is exactly what I did, I only have one 6 hole muffin tin...


A is totally giving Bee a "five"!


Tuesday, September 11, 2012

Hospital Maternity Gown

This Post is inspired by THIS pin...  The website for the pattern used is HERE...

So finally decided to get off my butt and make the maternity gown I have wanted for awhile...  I bought one to wear in the hospital when Lexi was born, but soon found out it was impractical as there were no snaps on the sleeves.  I had an IV, so no way to get it on and off.  SAD!  I did get to wear it soon after they took the IV out, but not for long. :(


This time knowing what I know I decided to search for one that would work.  The problem is they're all so $$$.  So I searched for DIY maternity hospital gowns, and came up with this one!  I thought...  "I can do that!"  Then forgot about it for a few weeks.  Now I am starting to think about getting my hospital bag together and decided to get it together and just do it.  I went to Hobby Lobby and rounded up the Materials...


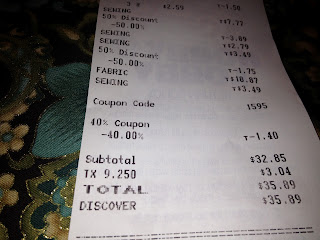
Ummm, yeah!  That's not really much of a cost savings.  I'm thinking that I need to get better at shopping around!  I did get super expensive fabric, but I LOVE it!
All the materials are gathered, and I figured out (again) how to thread my bobbin and sewing machine.  (It has been probably 6 years since I dusted that bad boy off!


Fabric, ribbon, snaps, interfacing and pins.


Here is the pattern all put together.  Now I just wait for the material to come out of the washer & drier.  I am taking this time to take the Kids to ju jitsu, & pick up Lexi from preschool.  I am hoping to get back to this project tonight, but in reality I know that this is unlikely.  :/

In reality, I did get back to it and even managed to cut all the pieces!  Then I fell into bed...

In the morning, I got back at it.  I honestly didn't know what serging the edges was supposed to look like, but I was pretty certain this IS NOT IT!  So google to the rescue.


This however IS what serging the edges is supposed to look like.  THANK YOU GOOGLE!


It was after this I stopped taking photos, and got really busy.  I serged all the edges, and then single stitched my way to DONE!  Here are the final results!


I even included a pocket for my cell phone!


I hammered snaps in the back, part of my reason for doing this is so no one has to see my big ole butt while I'm recovering.


I know the quality of my iPhone photos taken in the mirror completely blow you away right?!?